cilium endpoint 创建流程
pod 创建后,cilium 打通网络涉及以下内容:
- lxc 网卡的创建(cni 插件)
- bpf 代码的加载(agent)
- ipam 地址分配(agent)
- endpoint CR 的创建(agent)
- endpoint 生命周期管理(agent)
具体流程如下图
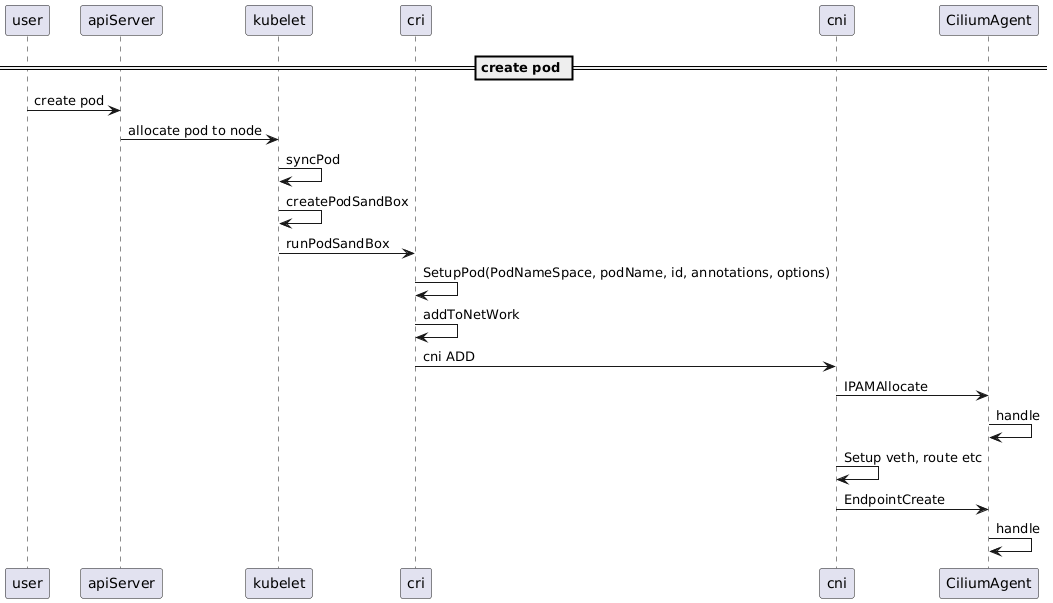
流程说明
cni add 流程主要分三步:
- 调用 ipam 接口从 agent 获取 ip 信息
- 创建 lxc 网卡(veth),根据 ip 信息配置网卡(mtu,gso,gro 配置),容器命名空间内路由等
- 调用 endpointCreate 接口通知 agent 开始接管 lxc 网卡(加载 bpf 代码等)
如果启用了 cniChaning,还会去执行 chaining 的动作
ipam 流程将在后期详细介绍,本篇主要分析 endpointCreate 之后的流程,也就是 bpf 代码是如何加载到 lxc 网卡上的。
cilium controller
cilium agent 代码内部,对于资源同步的场景,设计了一套 controller 框架。
controller 可以理解为异步任务控制器,在后台尝试某一对象的同步任务直到成功,并记录成功失败次数,错误日志等监控数据。每个 controller 对应一个协程。
controller 需要被 manager 绑定,而 manager 则绑定到某一特定资源,比如 endpoint
由于资源的变配会需要多个异步任务的执行,因此一个 manager 可以关联多个 controller,单个 controller 只负责某一特定的异步任务(只要是可能失败并需要重试的任务都适用,例如给 k8s 资源打 annotation,同步对象到某个存储,kvstore,bpfmap 等)
controller 之间通信通过 eventqueue 进行异步解耦。每个 evq 对应一个协程
endpoint manager 的架构图
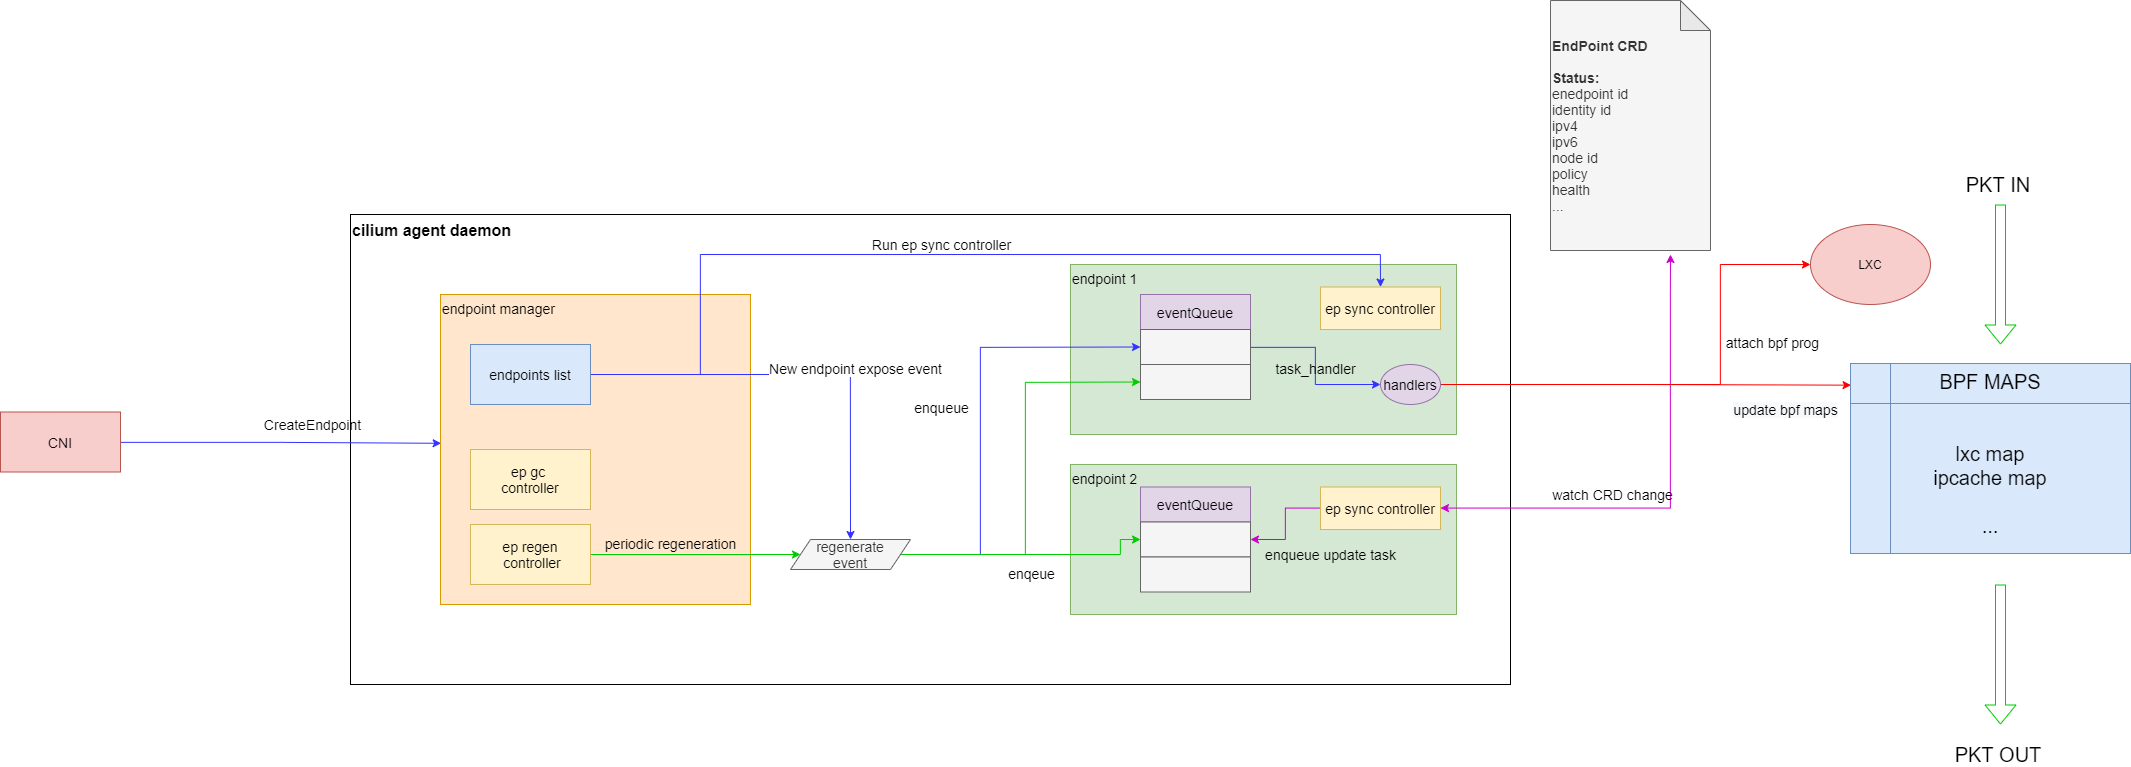
说明
上图中,endpoint manager 维护了本节点 endpoint 列表,并实现了
- gc controller:endpoint 定期清理,清理不健康的 endpoint。
- regenerate controller:endpoint 定期全量重建,重建 ep 对应的 policy 和 configuration
CNI 创建 endpoint 后,endpoint 对象会被创建。每个 endpoint 初始化时会有一个 eventQueue 和处理该 eventQueue 的一个 controller。endpoint manager 会将 regen 事件入队到 endpoint 的 eventQueue 中,并启动 endpoint 的 sync Controller。sync Controller 会同步 ep 信息到 k8s cep CR,这样用户就可以从 apiserver 获取 endpoint 状态了
ebpf 程序加载流程
eventQueue 中的 regeneration event 会触发 endpoint 的重建,也就是相关 ebpf 程序的编译加载和 ebpf map 数据的插入。
bpf 程序加载会发生在几种情况下:
- 第一次创建时进行初始化
- cilium 重启时,会进行一次 regenerate(按需初始化)
- 用户执行 cilium endpoint regenerate 时(按需)
- 用户执行 ciluim config 时(按需)
程序是否加载由编译级别来控制
0 -> “invalid” (未设置)
1:RegenerateWithoutDatapath -> “no-rebuild” (更新 policy,dns,只需更新 map,不重新编译加载 bpf)
2:RegenerateWithDatapath -> “rewrite+load” (新创建 endpoint)
这边可能会有个疑问,为什么更新 policy 不是更新 lxc 代码。这是因为 policy 代码是在 bpf_lxc 的最后使用尾调用执行的。因此更新 policy 只要更新 prog bpf,而不需要动已经加载在 lxc 上的代码
1 | static __always_inline int |
EndpointRegenerationEvent handler 流程
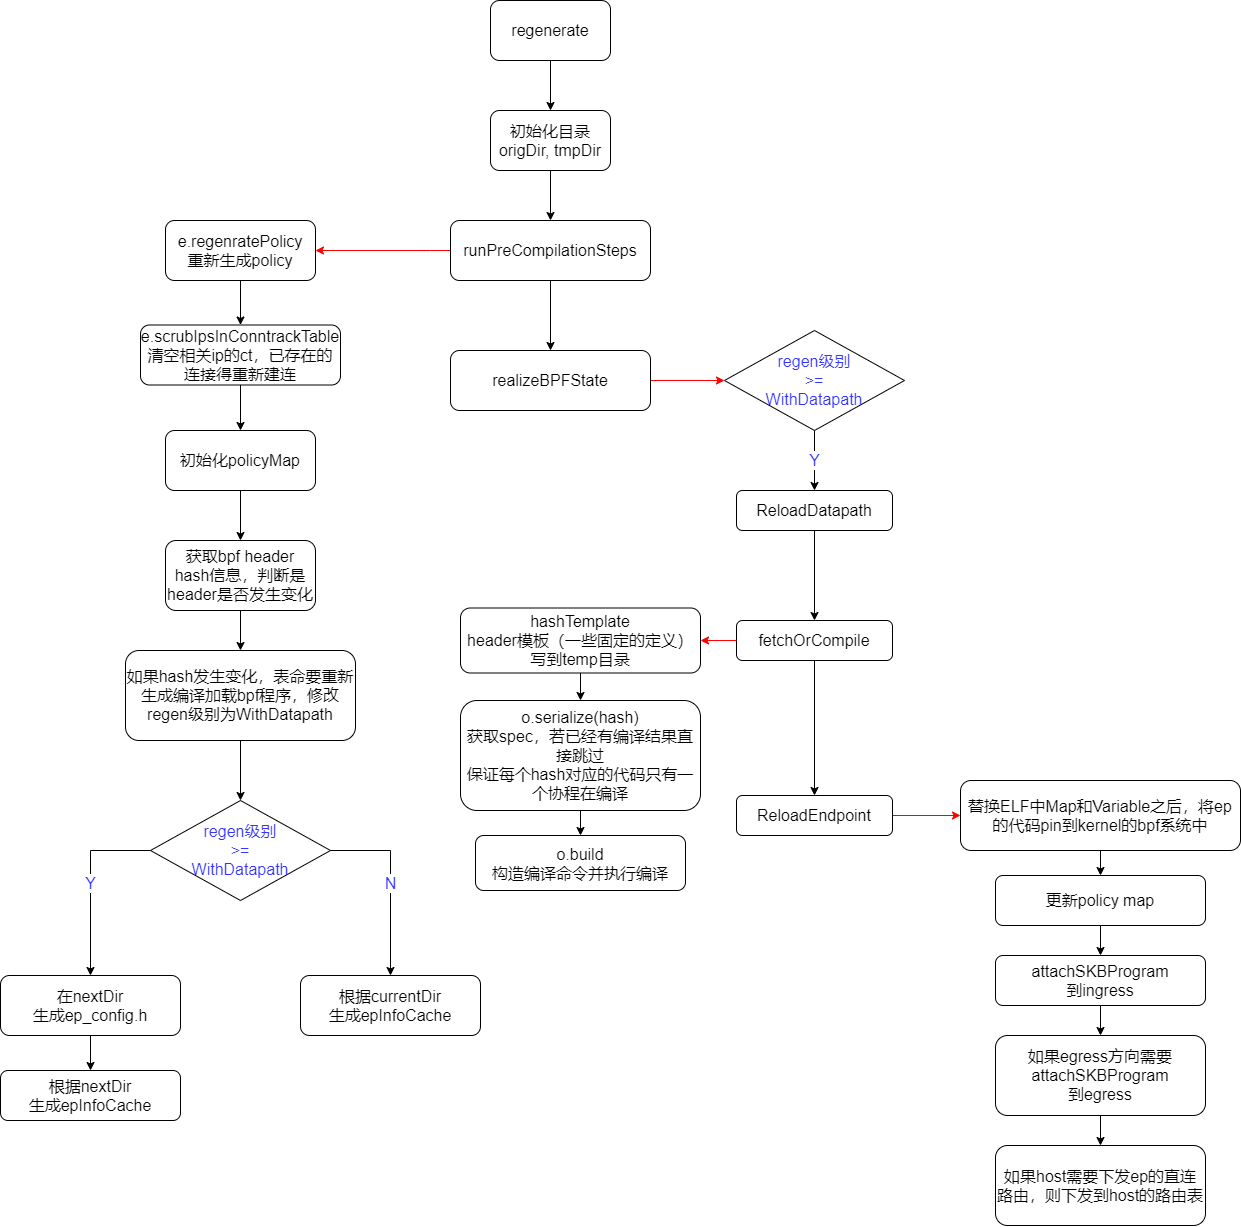
endpoint 的配置(例如开启 debug,trace)是通过修改编译时的头文件来实现的
下面是 state 目录
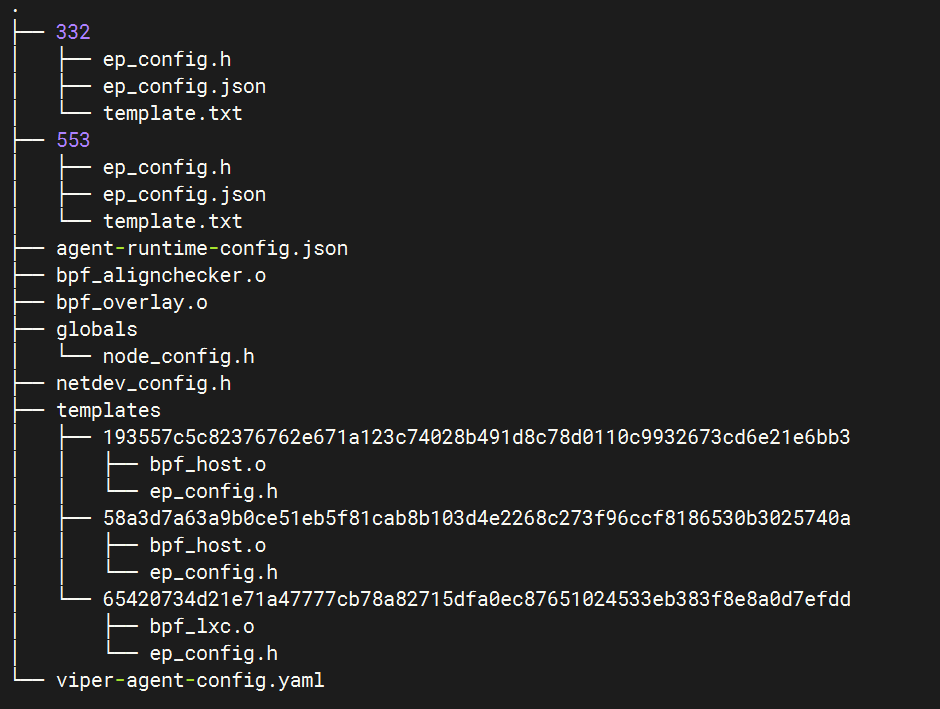
可以看到每个 endpoint 会有一个 ep id 对应的目录,目录里包含该 ep 的配置生成的头文件ep_config.h。
代码仓库里的ep_config.h只是一个样例,实际的是以 state 目录下生成的为准。
相应的,netdev 也有配置文件node-config.h
编译过程中,会生成 tmpDir,用来保存编译时的 headers。只有整个 generation 完全成功后,tmpDir 才会覆盖 origDir。
可以在 state 目录下执行inotifywait -r -m . -e open -e move -e create -e delete 查看相关文件的生成情况